Halloween Brownies are my go to fix when I want something cute and spooky for a party but I do not have the energy for a complicated dessert. You know that feeling when you promised to bring a treat, it is suddenly the night before, and you are staring into your pantry like it will magically help you? That is exactly when I make these. They come out fudgy, chocolatey, and they look festive even if you are not a pro at decorating. Plus, you can dress them up with simple candy and they still get that wow reaction. Let me walk you through my favorite easy method.
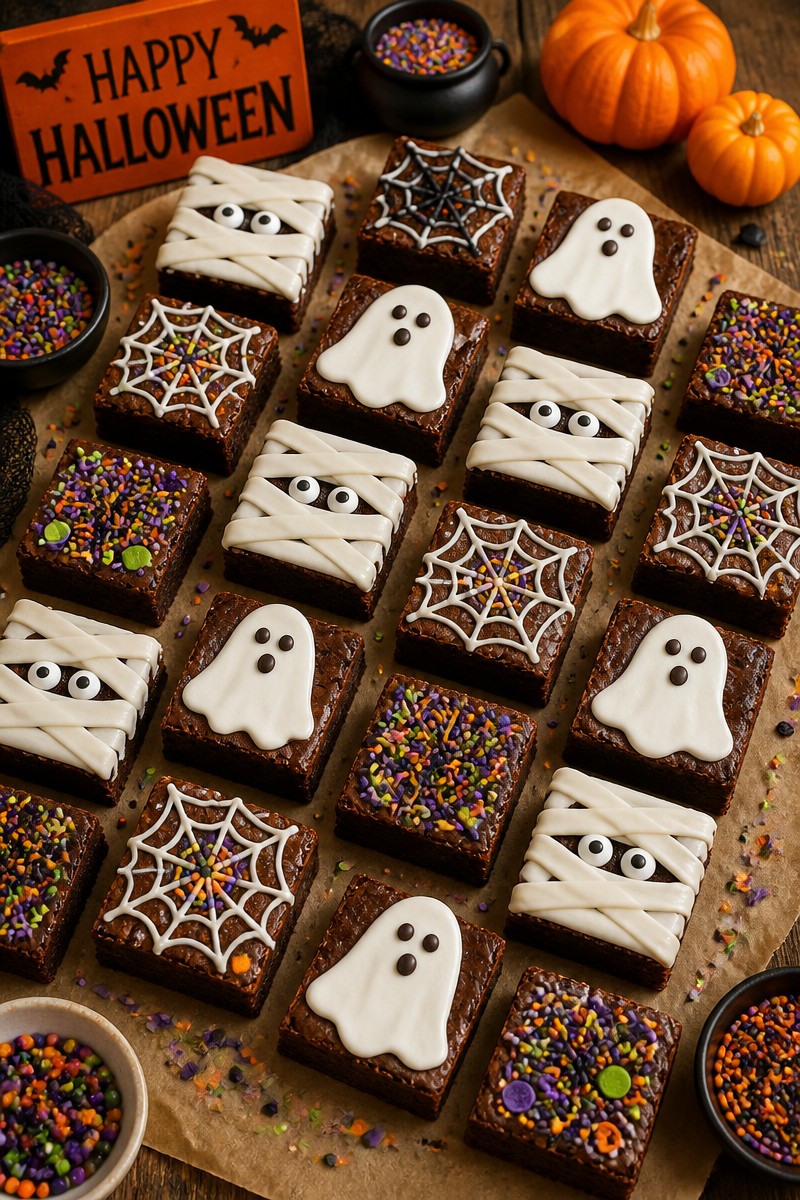
Table of Contents
Why You’ll Love This Halloween Brownies Recipe
This is the kind of recipe that makes you look like you tried really hard, even when you did not. The brownies bake in one pan, they slice cleanly, and the decorations can be as simple as you want.
Here is why I keep coming back to this every October:
Super easy: One bowl, basic ingredients, no fancy steps.
Fudgy and rich: The center stays soft and thick, not dry and cakey.
Perfect for parties: You can cut them into squares, tombstones, or little bite size pieces.
Kid friendly fun: Decorating feels like a craft project you can eat.
Also, Halloween Brownies travel well. I have carried them to school events, office potlucks, and family movie nights, and nobody complains about getting stuck with leftovers.
Ingredients for Halloween Brownies
I am giving you a simple from scratch list that does not require any weird specialty items. If you bake even a little, you probably have most of this already. If you want to shortcut with a boxed mix, I will talk about that later too.
What you’ll need
- 1/2 cup unsalted butter
- 1 cup granulated sugar
- 2 large eggs
- 1 teaspoon vanilla extract
- 1/3 cup unsweetened cocoa powder
- 1/2 cup all purpose flour
- 1/4 teaspoon salt
- 1/2 cup chocolate chips or chopped chocolate
For the spooky topping, pick one or mix a few:
- Orange and black sprinkles
- Candy eyes
- Mini marshmallows
- Chocolate sandwich cookies (for crumbs)
- White chocolate or vanilla frosting for “webs”
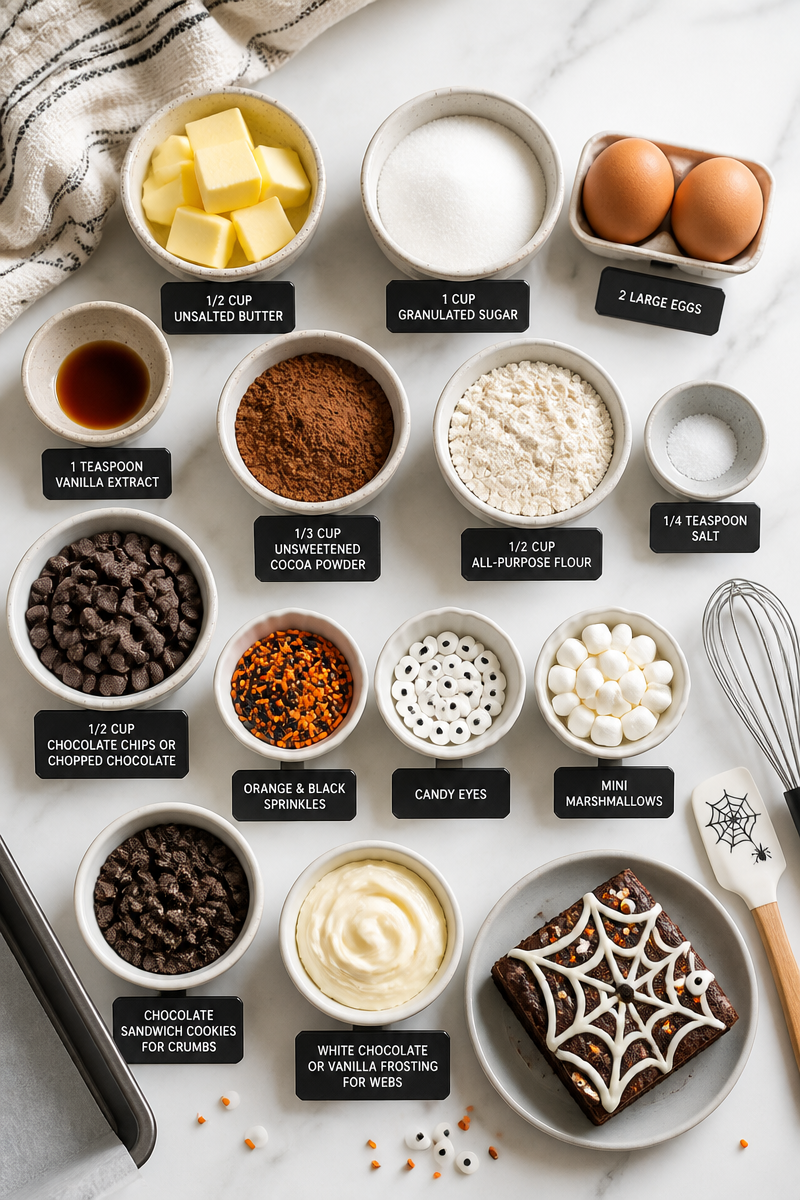
One quick ingredient tip: if your cocoa powder has been sitting in the back of the cabinet forever and smells kind of dusty, grab a fresh one. Cocoa is the main flavor here, so it matters.
How to Make Halloween Brownies (Step-by-Step)
These are classic pan brownies. Nothing complicated, just a few small details that keep them moist and fudgy.
1) Heat your oven to 350 F. Lightly grease an 8 inch square pan, or line it with parchment paper so you can lift the brownies out easily.
2) Melt the butter. I do this in a microwave safe bowl in short bursts, stirring in between. You can also melt it on the stove if you prefer.
3) Stir in the sugar while the butter is still warm. This helps the batter look glossy, which usually means good things are coming.
4) Add eggs and vanilla. Stir until it looks smooth and a bit thicker. I do not use a mixer for this. A spoon or spatula works fine.
5) Add cocoa powder, flour, and salt. Mix just until you do not see dry streaks. Over mixing is how brownies lose that soft bite.
6) Fold in chocolate chips. This is optional, but I love the extra pockets of melted chocolate.
7) Bake for about 22 to 28 minutes. Every oven is a little different. I start checking at 22 minutes. You want the edges set and the middle not jiggly, but a toothpick should come out with a few moist crumbs, not totally clean.
8) Cool before slicing. I know it is hard. But if you cut too soon, the center can get messy and the frosting can melt right off. I wait at least 30 minutes, longer if I have time.
When you are ready to decorate, this is when Halloween Brownies really turn into the fun party treat people remember.
Halloween Brownie Decorating Ideas
This is my favorite part because it is basically stress free. You do not need perfect piping skills. If your spider web looks a little wild, that honestly makes it better.
Here are a few easy ways to decorate:
1) Candy eyes monster brownies
Spread a thin layer of chocolate frosting or a drizzle of melted chocolate, then stick on candy eyes. Add sprinkles and you have instant goofy monsters.
2) Spider web tops
Use melted white chocolate or white frosting in a small sandwich bag. Snip the tiniest corner and draw circles, then drag a toothpick from the center outward to make the web lines. Add a plastic spider ring if you want extra drama.
3) Graveyard brownie squares
Press a rectangular cookie or a piece of white chocolate into the top as a “tombstone.” Write RIP with icing. Crumble chocolate cookies around it for dirt. This one always gets comments.
4) Pumpkin patch look
Scatter candy pumpkins on top with orange sprinkles. It looks festive in about ten seconds.
If you are making these for a party, I like to decorate only half the pan one way and half another. It makes the tray look exciting without extra work.
Tips for the Best Fudgy Halloween Brownies
I have made enough batches of brownies in my life to know where things go wrong. These tips keep them thick and soft, and they also help if you are baking with kids or baking in a hurry.
Do not over bake. This is the big one. Brownies continue cooking a little as they cool. If you wait until a toothpick is totally clean, they can turn dry.
Use parchment paper. Lifting the whole slab out makes cutting easier and keeps the edges from getting torn up.
Let them cool before decorating. Frosting on warm brownies turns into a slippery mess. If you want clean lines, wait.
Cut with a warm knife. Run your knife under hot water, wipe it dry, then slice. Repeat when needed. This helps you get neat squares, especially if you added melty chocolate chips.
Salt matters. Even a small amount makes the chocolate taste deeper and less flat.
If your kitchen is warm, pop the cooled brownies in the fridge for 20 minutes before slicing. They firm up just enough to look bakery neat.
Halloween Brownies Variations
I love a flexible recipe, because sometimes you are working with what you have, not what a recipe demands. Here are a few ways to switch it up.
Box mix shortcut: Use your favorite boxed brownie mix and focus your energy on decorating. To make boxed brownies taste a little richer, swap water for milk, or add an extra handful of chocolate chips.
Extra fudgy: Stir in 2 tablespoons of oil with the melted butter, or add an extra egg yolk. It makes them a bit denser and softer.
Minty “witchy” vibe: Add 1/4 teaspoon peppermint extract and top with green sprinkles and candy eyes.
Peanut butter swirl: Warm 1/3 cup peanut butter for a few seconds, dollop it over the batter, then swirl gently with a knife before baking.
Gluten free option: Swap the flour for a 1 to 1 gluten free baking blend. The texture might be slightly different, but they are still very snackable.
No matter which direction you go, the goal is the same: Halloween Brownies that taste like real chocolate and feel fun to serve.
Print
Halloween Brownies
- Total Time: 43 minutes
- Yield: 16 servings 1x
Description
These Halloween Brownies are fudgy, chocolatey treats that are easy to make and perfect for any spooky celebration.
Ingredients
- 1/2 cup unsalted butter
- 1 cup granulated sugar
- 2 large eggs
- 1 teaspoon vanilla extract
- 1/3 cup unsweetened cocoa powder
- 1/2 cup all purpose flour
- 1/4 teaspoon salt
- 1/2 cup chocolate chips or chopped chocolate
- Orange and black sprinkles (for topping)
- Candy eyes (for decoration)
- Mini marshmallows (for decoration)
- Chocolate sandwich cookies (for decoration)
- White chocolate or vanilla frosting (for decoration)
Instructions
- Heat your oven to 350°F. Lightly grease an 8-inch square pan or line it with parchment paper.
- Melt the butter in a microwave-safe bowl in short bursts, stirring in between.
- Stir in the sugar while the butter is still warm until glossy.
- Add the eggs and vanilla, mixing until smooth.
- Add cocoa powder, flour, and salt; mix until just combined.
- Fold in the chocolate chips.
- Bake for 22 to 28 minutes, checking at 22 minutes for doneness.
- Cool the brownies for at least 30 minutes before slicing.
Notes
Decorate the brownies with candy eyes, sprinkles, or cookies for a fun Halloween twist. If you want a thicker brownie, use an 8-inch pan; for a thinner one, use a 9-inch pan.
- Prep Time: 15 minutes
- Cook Time: 28 minutes
- Category: Dessert
- Method: Baking
- Cuisine: American
Nutrition
- Serving Size: 1 brownie
- Calories: 200
- Sugar: 15g
- Sodium: 50mg
- Fat: 10g
- Saturated Fat: 6g
- Unsaturated Fat: 3g
- Trans Fat: 0g
- Carbohydrates: 25g
- Fiber: 2g
- Protein: 3g
- Cholesterol: 30mg
Frequently Asked Questions
Can I make these ahead of time?
Yes. I actually think they are even better the next day. Bake them, cool completely, and store tightly covered. Decorate the day of your event if you want the toppings to look freshest.
How do I store Halloween Brownies?
Keep them in an airtight container at room temperature for about 3 days. If your toppings are melty or you used cream cheese frosting, store them in the fridge.
Can I freeze them?
Totally. Freeze undecorated brownies wrapped well, then put them in a freezer bag. They keep about 2 months. Thaw on the counter and decorate after they come to room temp.
What pan size works best?
An 8 inch square pan gives you thicker brownies. A 9 inch pan works too, but they will bake faster and come out a bit thinner, so start checking a few minutes early.
How do I know when they are done without drying them out?
Look for set edges and a center that is no longer glossy wet. A toothpick should come out with moist crumbs. If it is clean, they are probably already on the dry side.
Conclusion
If you need a festive treat that is easy, reliable, and honestly just fun to eat, these Halloween Brownies are it. You get a rich chocolate base, quick steps, and decorations that can be fancy or super simple depending on your mood. Keep an eye on the bake time, let them cool, then go wild with candy eyes and sprinkles. If you make them, I hope you bring them to a party and watch how fast they disappear.