There’s something magical about the combination of crispy, golden-brown chicken, infused with rich garlic butter flavor. Who can resist the allure of Crispy Garlic Butter Chicken, especially when it’s smothered in deliciousness? Perfectly cooked chicken, bathed in fragrant garlic butter, brings joy to any dinner table. Whether you’re looking for a quick weeknight meal or a dish to impress guests, this recipe fits the bill splendidly. Let’s dive into how you can create this culinary delight right at home.
Print
Crispy Garlic Butter Chicken
- Total Time: 45 minutes
- Yield: 4 servings 1x
Description
A delightful combination of crispy chicken infused with rich garlic butter flavor, perfect for weeknight meals or impressing guests.
Ingredients
- 4 chicken thighs (bone-in, skin-on)
- 4 tablespoons unsalted butter
- 4 cloves garlic (minced)
- 1 teaspoon fresh rosemary (finely chopped)
- 1 teaspoon fresh thyme (finely chopped)
- Salt and pepper (to taste)
- Lemon wedges (for serving)
- Optional: parsley (for garnish)
Instructions
- Preheat your oven to 400°F (200°C) and pat the chicken thighs dry.
- Season both sides of the chicken with salt and pepper, then sprinkle with rosemary and thyme.
- Melt the butter in a large oven-safe skillet over medium heat, allowing it to brown slightly.
- Add minced garlic to the skillet and cook until fragrant and golden, about 1 to 2 minutes.
- Carefully add the chicken thighs, skin-side down, and sear for about 5 minutes until crispy.
- Turn the chicken over and spoon garlic butter sauce over the top.
- Transfer the skillet to the oven and roast for about 25 minutes until the internal temperature reaches 165°F (75°C).
- Remove the skillet from the oven and let the chicken rest for about 5 minutes before serving.
Notes
For healthier alternatives, substitute skinless chicken breast or use plant-based butter instead of regular butter.
- Prep Time: 15 minutes
- Cook Time: 30 minutes
- Category: Main Course
- Method: Baking
- Cuisine: American
Nutrition
- Serving Size: 1 serving
- Calories: 350
- Sugar: 0g
- Sodium: 400mg
- Fat: 25g
- Saturated Fat: 10g
- Unsaturated Fat: 10g
- Trans Fat: 0g
- Carbohydrates: 1g
- Fiber: 0g
- Protein: 30g
- Cholesterol: 100mg
Ingredients
For this recipe, you’ll need a handful of simple ingredients that may already be in your kitchen. Here’s your shopping list:
- 4 chicken thighs (bone-in, skin-on for maximum crispiness)
- 4 tablespoons unsalted butter
- 4 cloves garlic (minced)
- 1 teaspoon fresh rosemary (finely chopped)
- 1 teaspoon fresh thyme (finely chopped)
- Salt and pepper (to taste)
- Lemon wedges (for serving)
- Optional: parsley (for garnish)
You can switch out some items if needed. For instance, turkey or chicken bacon makes a great substitute for traditional bacon, while olive oil can replace butter for a healthier option. For a plant-based twist, try using tofu or seitan and swap in vegan butter.
Timing
Preparation Time: 15 minutes
Cooking Time: 30 minutes
Total Time: 45 minutes
If you’re short on time, consider pre-seasoning the chicken in advance, allowing the flavors to really soak in while you go about your day.
How to Make Crispy Garlic Butter Chicken
Step 1: Start by preheating your oven to 400°F (200°C). While that’s happening, pat the chicken thighs dry with paper towels. This step is crucial as removing excess moisture will help the skin crisp up beautifully.
Step 2: Season both sides of the chicken generously with salt and pepper. Sprinkle the chopped rosemary and thyme over the chicken to infuse those herbal flavors.
Step 3: In a large, oven-safe skillet, melt the butter over medium heat. Here’s a handy tip: for an extra layer of flavor, let the butter brown slightly. It brings a nutty aroma that enhances the dish.
Step 4: Once the butter is melted, add minced garlic and stir, cooking until the garlic is fragrant and golden—about 1 to 2 minutes. Be careful not to let it burn, as burnt garlic will add bitterness.
Step 5: Carefully add the seasoned chicken thighs, skin-side down, into the skillet. Sear for about 5 minutes until the skin is crispy and golden. Resist the urge to move them around to get that perfect crust.
Step 6: After the skin is crispy, turn the chicken over and spoon some of the garlic butter sauce over the top. This will keep the chicken moist while infusing it with flavor as it bakes.
Step 7: Transfer the skillet to the preheated oven and roast the chicken for about 25 minutes or until the internal temperature reaches 165°F (75°C). The skin should be gloriously golden and crispy.
Step 8: Once cooked, take out the skillet (careful, it’s hot!) and let the chicken rest for about 5 minutes. This helps the juices redistribute, making each bite succulent.
Healthier Alternatives
If you’re looking to make healthier substitutions, consider the following options:
- Substitute chicken thighs with skinless breast for lower fat content.
- Use ghee or a plant-based butter alternative for lactose-free options.
- Swap out traditional butter for olive oil to cut down on saturated fats.
- For a vegetarian version, use extra-firm tofu marinated in garlic and herbs before baking.
Serving Suggestions
Crispy Garlic Butter Chicken is a star on its own but can be enhanced with some thoughtful side dishes. Here are a few ideas:
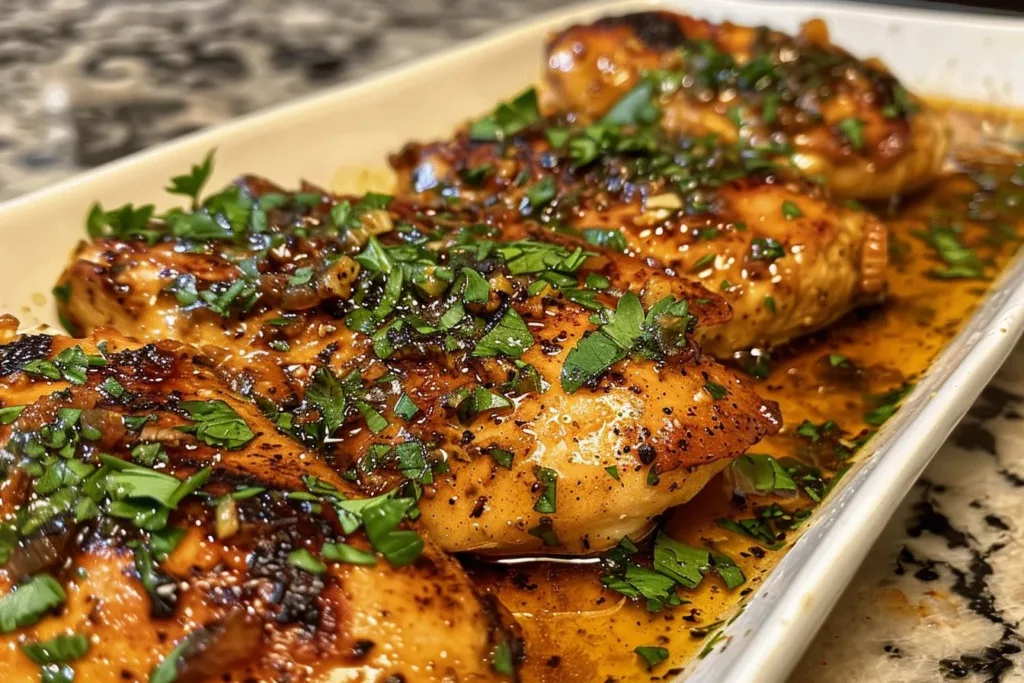
- Serve over a bed of sautéed spinach or kale for a colorful contrast.
- Pair with creamy mashed potatoes or baked sweet potatoes to soak up the delicious garlic butter.
- For a lighter option, try it alongside a fresh garden salad topped with a zesty lemon vinaigrette.
- Don’t forget a side of artisan bread to mop up any lingering sauce.
Common Mistakes to Avoid
To ensure your dish turns out perfect:
- Avoid overcrowding the skillet; this can cause the chicken to steam instead of crisp up.
- Don’t skip the resting time after cooking; this is vital for juicy chicken.
- Make sure to monitor the garlic closely when sautéing. A minute too long can turn it from lovely to burnt.
- Ensure the chicken is at room temperature before cooking. Cooking cold chicken can result in uneven cooking.
Storage Tips
If you have leftovers (though they’re unlikely!), follow these storage methods:
- Refrigerate for up to 3 days in an airtight container.
- For longer storage, freeze the chicken. It will keep well for up to 3 months. Just be sure to let it cool completely before freezing.
- When reheating, use a microwave or oven set to low heat to ensure even warming without drying it out.
FAQs
What can I use instead of butter in this recipe?
You can use olive oil or ghee as a healthier alternative to butter. For a plant-based option, try using a vegan butter substitute.
Can I prepare the chicken in advance?
Absolutely! Marinate the chicken and season it up to a day ahead. This allows for deeper flavor absorption.
Is it necessary to sear the chicken before baking?
Yes! Searing the chicken helps create a crispy skin and adds depth to the flavor. It’s a crucial step for this dish.
How do I know when the chicken is cooked through?
Check the internal temperature with a meat thermometer; it should read 165°F (75°C). Alternatively, the juices should run clear when pierced at the thickest part of the chicken.
Can I use boneless chicken thighs?
Yes, you can! Just adjust the cooking time, as boneless chicken often cooks quicker than bone-in versions. Adjust your time accordingly to avoid drying them out.
Conclusion
Crispy Garlic Butter Chicken promises to be a showstopper at your table—all while being surprisingly simple to make. The luscious flavors of garlic and butter complement the crispiness of the chicken, creating a dish that’s perfect for any occasion. Don’t hesitate—give this recipe a try, and maybe explore other exciting recipes on our blog!