Classic Deviled Eggs are one of those party foods that sound simple, but somehow they can still turn out dry, bland, or oddly watery if you have not made them in a while. I have had all of those little disappointments, usually five minutes before guests show up. So I started making this version the same way every time, and it has not failed me yet. It is creamy, tangy, and easy to pipe or spoon without a bunch of fuss. If you need a go to appetizer for holidays, potlucks, baby showers, or just a snack dinner, you are in the right place. Let’s make them the stress free way.
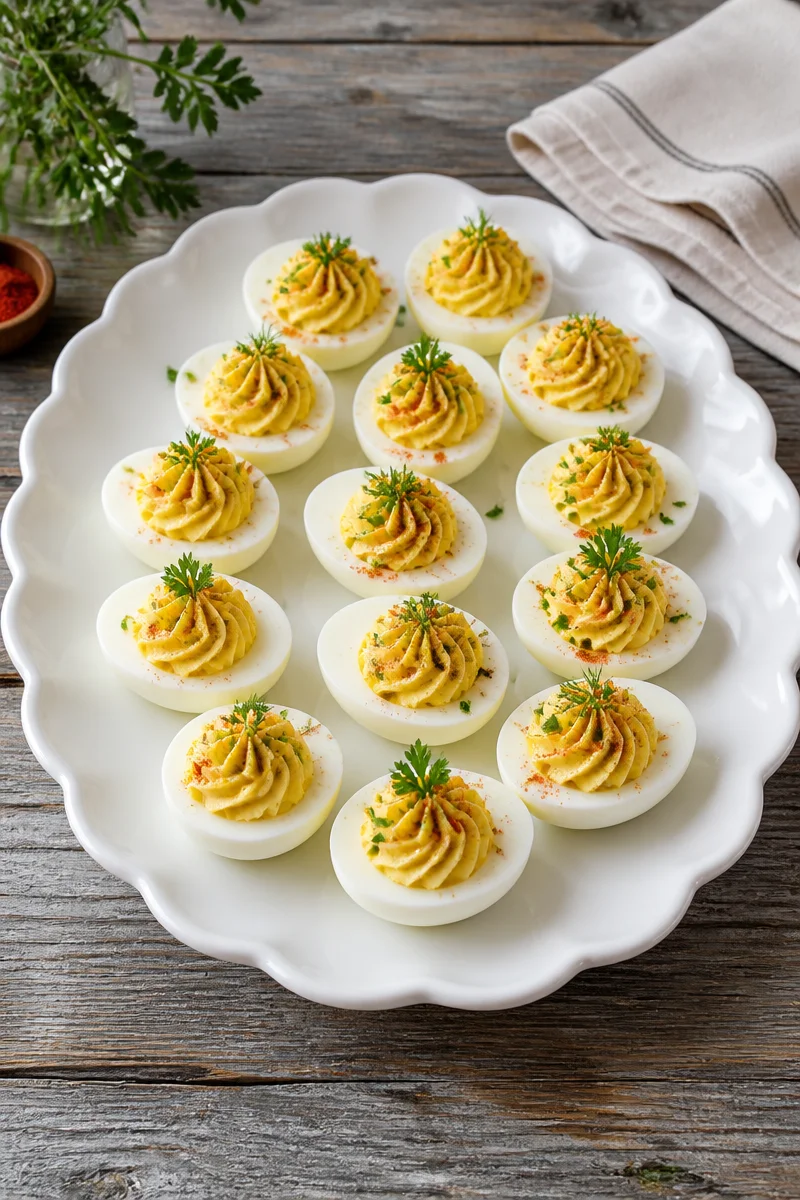
Table of Contents
What Are Deviled Eggs?
Deviled eggs are hard boiled eggs that get cut in half, then the yolks are mixed with a few creamy and tangy ingredients and put back into the whites. The word “deviled” is an old school way of saying the filling is seasoned up and not boring. You will see them at picnics, church dinners, and family gatherings because they are familiar, affordable, and easy to grab.
I also love that they are flexible. You can keep them super classic, or you can add a little heat, crunch, or smokiness. But when you need something that makes everyone happy, the classic version is the one people reach for first. And yes, I have watched adults hover around the tray like it is the main event.
Ingredients for Classic Deviled Eggs
This is the part where the recipe earns its “easy” label. You probably have most of this already. The exact amounts can be tweaked, but this combo is the balance I come back to because it tastes like the deviled eggs I grew up with, just a little better.
- Large eggs (fresh is fine, but slightly older eggs peel easier)
- Mayonnaise for creaminess
- Yellow mustard for that classic tang
- Dill pickle relish or finely chopped pickles for a little zip
- White vinegar or pickle juice, just a small splash
- Salt and black pepper
- Paprika for the top
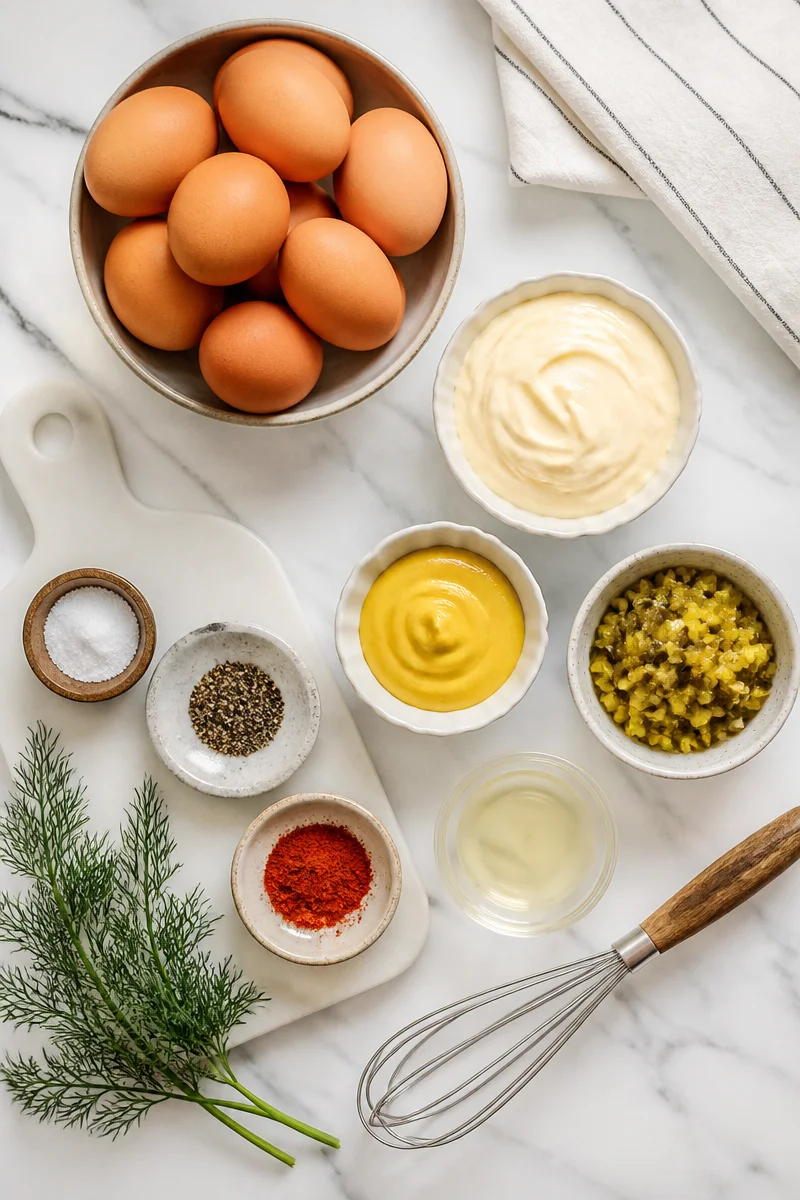
If you want a tiny upgrade without changing the vibe, use a good mayonnaise you actually like. It makes a difference because mayo is the main flavor in the filling. Also, relish is optional, but I personally think it gives the filling that little “oh yeah” bite.
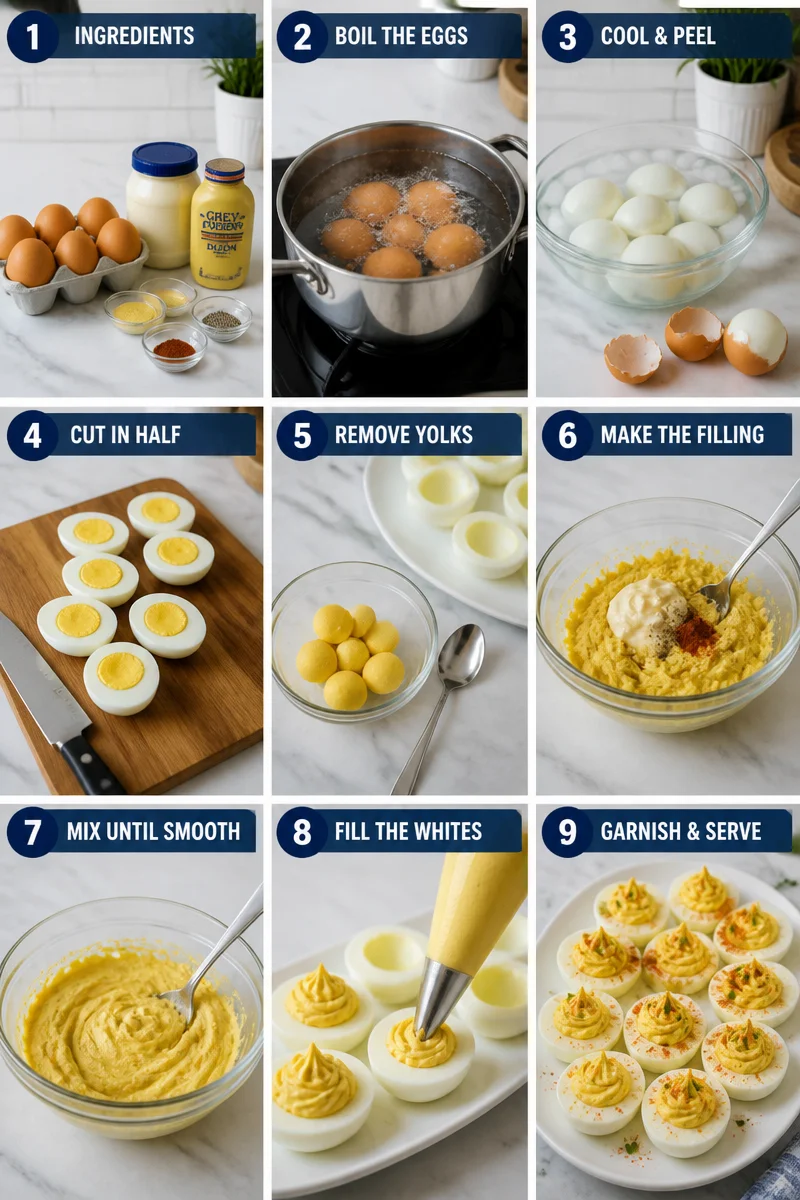
How to Make Classic Deviled Eggs (Step-by-Step)
I am going to walk you through the method I use at home, including the little details that prevent the usual deviled egg problems. This makes the whole thing feel way more predictable, which is what we all want.
Step 1: Boil the eggs without drama
Place the eggs in a pot and cover with cold water by about an inch. Bring it to a gentle boil, then turn off the heat, cover the pot, and let the eggs sit. For large eggs, I usually do about 10 to 12 minutes of sitting time. Then drain and move them straight into an ice water bath for at least 10 minutes. This helps with peeling and keeps the yolks from getting that greyish ring.
Step 2: Peel, slice, and pop out the yolks
Tap the eggs all over on the counter, then peel under a little running water if you need help. Slice each egg lengthwise. Carefully scoop the yolks into a bowl and set the whites on a plate or deviled egg tray. If one white tears, do not panic. Put that one on the “taste test” plate. Every cook deserves a snack.
Step 3: Mix the filling until it is smooth
Mash the yolks with a fork until crumbly. Then add mayonnaise, mustard, relish, a small splash of vinegar or pickle juice, and a pinch of salt and pepper. Stir until creamy. If you want it extra smooth, you can press the yolks through a fine strainer first, but I usually just mix well and call it good.
Here is a simple guide so you can adjust without overthinking:
If the filling tastes flat, add a pinch of salt or an extra dab of mustard. If it feels too thick, add a tiny bit more mayo. If it is too tangy, add a touch more mayo to mellow it out.
Step 4: Fill the egg whites and finish
Spoon the filling into the whites, or pipe it using a zip top bag with the corner snipped off. Sprinkle paprika on top. That little red dusting is classic for a reason. It makes them look finished and adds a gentle peppery warmth.
When I am bringing these somewhere, I wait to sprinkle paprika until I arrive. It keeps the tops looking brighter and fresher.
Tips for the Best Deviled Eggs
These are the small things that take deviled eggs from “fine” to “why are these so good?” None of them are hard, they just save you from the usual pitfalls.
Use an ice bath. It helps peeling and keeps the yolks a nicer color.
Taste the filling before you fill. This sounds obvious, but it is the moment where you can fix salt, tang, and creaminess.
Do not overdo the vinegar. A little perk is great, too much makes the filling sharp and watery.
Pipe them if you want them pretty. Even a basic bag trick makes them look party ready.
Keep them cold. They taste best chilled, and it is also the safest way to serve them.
“I made these for our family cookout and the tray disappeared in minutes. The relish and mustard balance was perfect, and they did not get runny at all.”
One more personal tip: if you are making Classic Deviled Eggs for a holiday, make a few extra. People always say they will just have one, and then they are back for another. It happens every single time.
Deviled Egg Variations
Once you have the classic base down, you can play around without fear. I still think Classic Deviled Eggs are the best starting point, but these little twists are fun when you want to match a theme or use what is in your fridge.
Spicy: Add a little hot sauce, a pinch of cayenne, or chopped pickled jalapenos.
Bacon: Stir in crumbled bacon and top with a tiny extra piece for crunch.
Herby: Add chopped chives or dill for a fresher taste.
Smoky: Use smoked paprika instead of regular paprika.
Avocado: Replace some mayo with mashed avocado for a green, creamy filling.
The main thing is not to overload the filling with too many add ins at once. A deviled egg is small, so flavors can get loud fast.
How to Store Deviled Eggs
Deviled eggs are best the day you make them, but you can absolutely prep them ahead if you do it the smart way. If you are planning for a party, this will save your sanity.
In the fridge: Store them in a covered container. If you have a deviled egg tray with a lid, even better. They usually keep well for up to 2 days, and sometimes 3 if everything was handled cleanly and kept cold.
Make ahead trick: Boil and peel the eggs the day before. You can also mix the yolk filling and store it in a sealed container, then fill the whites closer to serving time. This keeps the whites from getting too soft.
For travel: Keep them in a cooler with ice packs. I know that sounds like “mom advice,” but it matters with eggs and mayo.
Print
Classic Deviled Eggs
- Total Time: 22 minutes
- Yield: 6 servings 1x
Description
Creamy, tangy deviled eggs perfect for parties, potlucks, and gatherings.
Ingredients
- 6 large eggs
- 1/4 cup mayonnaise
- 1 teaspoon yellow mustard
- 2 tablespoons dill pickle relish
- 1 teaspoon white vinegar
- Salt and black pepper to taste
- Paprika for garnish
Instructions
- Boil the eggs by covering them with cold water in a pot. Bring to a gentle boil, then turn off the heat and cover the pot. Let sit for 10-12 minutes, then place in an ice water bath for at least 10 minutes.
- Peel the eggs under running water if needed. Slice each egg lengthwise and carefully scoop the yolks into a bowl.
- Mix the yolks with mayonnaise, mustard, relish, vinegar, and a pinch of salt and pepper until creamy.
- Fill the egg whites with the mixture, using a spoon or piping bag. Sprinkle paprika on top for garnish.
Notes
Use slightly older eggs for easier peeling. Taste the filling before serving to adjust seasoning.
- Prep Time: 10 minutes
- Cook Time: 12 minutes
- Category: Appetizer
- Method: Boiling
- Cuisine: American
Nutrition
- Serving Size: 1 egg half
- Calories: 200
- Sugar: 1g
- Sodium: 300mg
- Fat: 15g
- Saturated Fat: 3g
- Unsaturated Fat: 10g
- Trans Fat: 0g
- Carbohydrates: 2g
- Fiber: 0g
- Protein: 6g
- Cholesterol: 186mg
Frequently Asked Questions
Why are my deviled eggs watery?
This usually happens when there is too much relish liquid, vinegar, or pickle juice. Drain relish well, and add liquid a few drops at a time. If it is already watery, mix in a bit more mashed yolk or a small spoon of mayo to thicken it.
How do I make them easier to peel?
Use an ice bath after cooking, and peel once they are fully cool. Slightly older eggs can peel easier than eggs bought the same day. Also, cracking and rolling the egg gently helps loosen the shell.
Can I make Classic Deviled Eggs without relish?
Yes. You will still get great flavor from mayo, mustard, and seasoning. If you want a similar tang, add a tiny splash of pickle juice or a little chopped pickle instead.
How far in advance can I make them?
I like making them up to 24 hours ahead. For the freshest texture, store whites and filling separately, then assemble a few hours before serving.
What is the best way to fill them without a piping bag?
A spoon works fine, but for a cleaner look, use a zip top bag. Scoop the filling in, squeeze it to one corner, and snip a small hole. It is quick and honestly less messy than it sounds.
Conclusion
Classic Deviled Eggs do not need fancy ingredients or chef tricks, just a solid method and a filling that is seasoned the way you like it. Keep the eggs easy to peel, taste the filling as you go, and do not stress about making every single one look perfect. The funny thing is that even the “ugly” ones disappear first because someone always sneaks one early. Make a batch soon and tell me if your people hover around the plate like mine do.