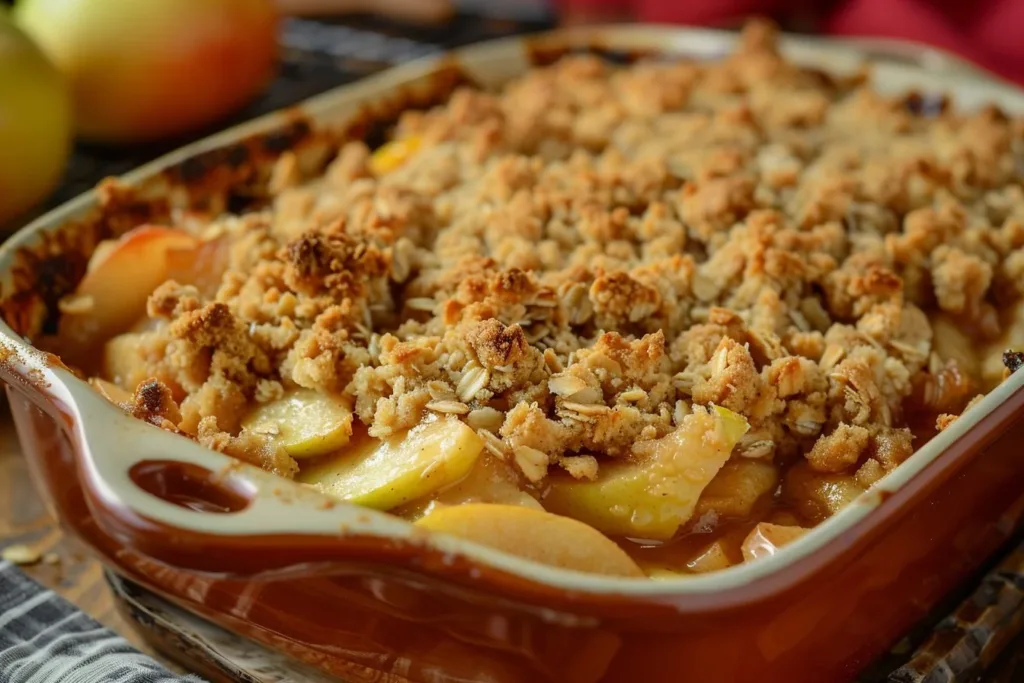
Old-Fashioned Apple Crisp is the perfect dish for cozy nights. Picture this: warm, spiced apples hidden beneath a crunchy oat topping, all served with a scoop of vanilla ice cream. It’s the kind of dessert that instantly brings back sweet memories and fills your home with the aroma of cinnamon and baked apples. As the leaves turn and the weather cools, this nostalgic favorite beckons. Let’s dive into the recipe and explore just how easy it is to whip up this comforting dessert.
Ingredients
Gathering the right ingredients is the first step to achieving that satisfying crunch and soft apple filling. Here’s what you’ll need:
For the Filling:
- 6 cups of peeled, sliced apples (Granny Smith or Honeycrisp work great)
- 1 cup of granulated sugar (you can reduce it for a less sweet version)
- 1 tablespoon of lemon juice
- 1 teaspoon of ground cinnamon
- 1/4 teaspoon of nutmeg (optional, for those who love warmth)
For the Topping:
- 1 cup of rolled oats
- 1 cup of all-purpose flour (or gluten-free flour for a gluten-free option)
- 1/2 cup of packed brown sugar
- 1/2 cup of cold butter, diced
- 1/2 teaspoon of salt
Optional Ingredients:
- A handful of chopped nuts (like walnuts or pecans) for extra crunch
- Raisins or dried cranberries for a pop of flavor
Timing
Preparation doesn’t take long, so let’s get into the details!
- Prep Time: 15 minutes
- Cooking Time: 45 minutes
- Total Time: 1 hour
Having everything ready can save you time. While the crisp bakes, you can tidy up the kitchen or pour yourself a cup of tea.
How to Make Old-Fashioned Apple Crisp
Creating a delicious Old-Fashioned Apple Crisp is straightforward. Just follow these steps, and you’ll have a treat ready in no time!
Step 1: Preheat your oven to 350°F (175°C). This ensures the perfect bake for your crisp.
Step 2: In a large bowl, toss your sliced apples with lemon juice, granulated sugar, cinnamon, and nutmeg. This mix will bring out the tartness of the apples and intensify the flavors.
Step 3: Spread the apple mixture evenly in a 9×13 inch baking dish. Make sure it’s nice and snug in there; you want the layers to meld as they bake.
Step 4: Now, let’s prepare the topping! In a separate bowl, mix together rolled oats, flour, brown sugar, and salt. Ensure there are no clumps.
Step 5: Add the diced cold butter to the topping mixture. Use your fingers or a pastry cutter to blend until you achieve a crumbly texture. You could also use a food processor for this step if you want to save time.
Step 6: Sprinkle the topping evenly over the apple mixture in the baking dish. You want every bite to have a little crunch.
Step 7: Bake in your preheated oven for 40 to 45 minutes, or until the topping is golden brown and the apples are bubbling. It’s essential to keep an eye on it; the aroma will be irresistible!
Step 8: Once baked, let the crisp cool slightly before serving. This helps everything settle, making it easier to dish out.
Healthier Alternatives
If you’re looking to make a few swaps without losing the traditional taste, consider these options:
- Substitute granulated sugar with coconut sugar or honey for a more natural sweetness.
- Use almond flour or oat flour in place of regular flour for a gluten-free version.
- For a vegan twist, replace butter with coconut oil or a vegan butter alternative.
Serving Suggestions
Serving your Old-Fashioned Apple Crisp can be just as fun as making it!
- Presentation: Serve it warm in beautiful bowls, topped with a scoop of vanilla ice cream or whipped cream.
- Beverage Pairings: Consider a cup of hot cider or herbal tea that complements the spices in the dish.
- Side Dishes: Pair it with a light salad for a balanced meal. A simple green salad with a lemon vinaigrette can brighten up the meal!
Common Mistakes to Avoid
Even seasoned bakers can run into snags while preparing this dessert. Here are some common pitfalls:
- Not Using Enough Apples: The filling should be plentiful! Lightly packed apples allow for that delightful ooey-gooey texture.
- Overmixing the Topping: Keep your topping crumbly; overmixing can make it tough.
- Not Letting it Cool: It’s tempting to dive right in, but letting it sit for a few minutes helps the flavors meld and makes serving easier.
Storage Tips
When you have leftovers, storing them properly can make them just as enjoyable the next day.
- Refrigerator Storage: Keep your apple crisp covered in the fridge for up to 3 days.
- Freezer Storage: You can freeze it for up to 3 months. Make sure it’s in an airtight container.
- Reheating Instructions: To reheat, pop it in the oven at 350°F (175°C) for about 15 to 20 minutes until warmed through. You can also microwave it for quick heating but know that it won’t regain its crunch.
Frequently Asked Questions
Can I use other fruits in this recipe?
Absolutely! Peaches, pears, or berries can be delicious alternatives, or even a combination of several fruits for a mixed fruit crisp.
How do I know when the apples are done?
The apples should be tender and the topping should be golden brown. A fork can easily pierce through the apple layers!
Can I make this ahead of time?
You can prepare the filling and topping separately and combine them just before baking. This way, you can enjoy fresh warm crisp with minimal effort!
Is it okay to leave it out at room temperature?
While it’s best to refrigerate it after a couple of hours to maintain freshness, it can be left out for up to 2 hours at room temperature if serving.
What’s the best way to customize my apple crisp?
You can add spices like cardamom or ginger for an extra flavor kick, or mix in some oats or nuts for added texture. The beauty of this recipe lies in its versatility!
Print
Old-Fashioned Apple Crisp
- Total Time: 60 minutes
- Yield: 8 servings 1x
Description
This comforting dessert features warm spiced apples hidden beneath a crunchy oat topping, perfect for cozy nights.
Ingredients
- 6 cups of peeled, sliced apples (Granny Smith or Honeycrisp)
- 1 cup of granulated sugar
- 1 tablespoon of lemon juice
- 1 teaspoon of ground cinnamon
- 1/4 teaspoon of nutmeg (optional)
- 1 cup of rolled oats
- 1 cup of all-purpose flour (or gluten-free flour)
- 1/2 cup of packed brown sugar
- 1/2 cup of cold butter, diced
- 1/2 teaspoon of salt
- A handful of chopped nuts (optional)
- Raisins or dried cranberries (optional)
Instructions
- Preheat your oven to 350°F (175°C).
- Toss your sliced apples with lemon juice, granulated sugar, cinnamon, and nutmeg.
- Spread the apple mixture evenly in a 9×13 inch baking dish.
- Mix together rolled oats, flour, brown sugar, and salt in a separate bowl.
- Add the diced cold butter to the topping mixture and blend until crumbly.
- Sprinkle the topping evenly over the apple mixture.
- Bake for 40 to 45 minutes, until topping is golden brown and apples are bubbling.
- Let the crisp cool slightly before serving.
Notes
Serve warm with vanilla ice cream or whipped cream. Can substitute sugar for honey or coconut sugar.
- Prep Time: 15 minutes
- Cook Time: 45 minutes
- Category: Dessert
- Method: Baking
- Cuisine: American
Nutrition
- Serving Size: 1 serving
- Calories: 350
- Sugar: 20g
- Sodium: 100mg
- Fat: 18g
- Saturated Fat: 10g
- Unsaturated Fat: 8g
- Trans Fat: 0g
- Carbohydrates: 50g
- Fiber: 4g
- Protein: 3g
- Cholesterol: 30mg
Conclusion
This Old-Fashioned Apple Crisp is a magical dessert that wraps you in warmth and nostalgia. It’s the perfect unassuming treat for gatherings or a chilly night at home. With a little time, you can create an irresistible crispy delight to share with friends and family. So, roll up your sleeves and give this recipe a go! You might find that it becomes a cherished staple in your household.