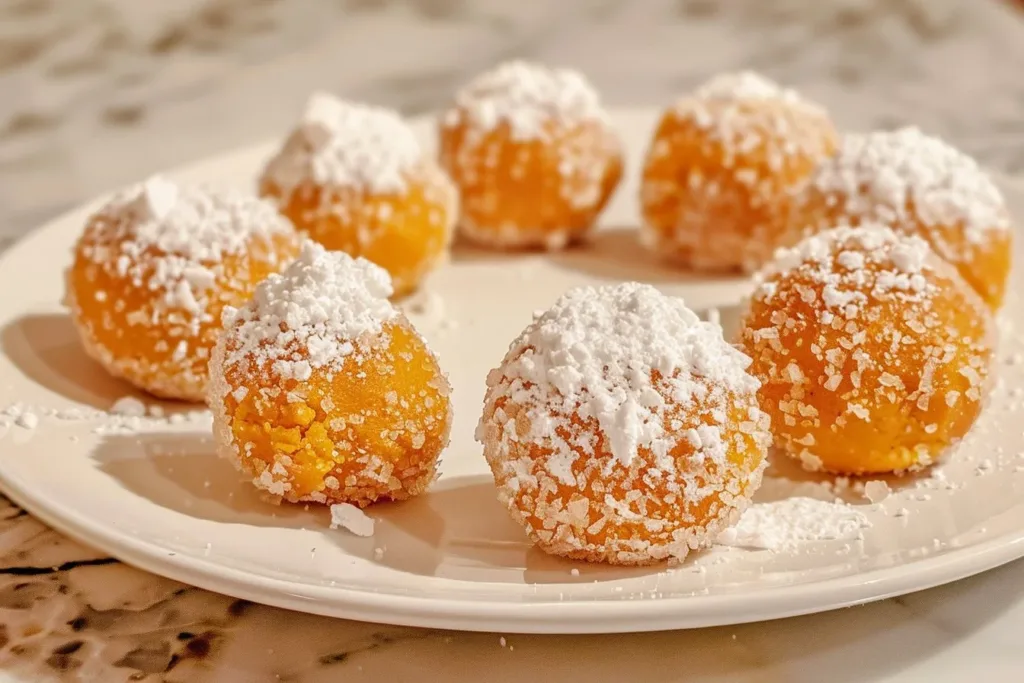
There’s something about fall that stirs up cravings for creamy, pumpkin-flavored treats. If you’re anything like me, the allure of a delicious, no-bake dessert is hard to resist! Imagine biting into tiny, heavenly balls of pumpkin cheesecake bliss, each one rich, sweet, and perfectly spiced. With the crisp autumn air around us, it’s time to indulge in an easy, no-bake pumpkin cheesecake balls recipe that promises to be a hit at your next gathering or even a cozy night in.
Ingredients
Let’s gather those essential ingredients to prepare your delightful no-bake pumpkin cheesecake balls. Here’s what you’ll need:
- 1 cup cream cheese, softened
- 1 cup pumpkin puree (not pumpkin pie filling)
- 1 cup powdered sugar
- 1 teaspoon vanilla extract
- 1 teaspoon pumpkin pie spice (or a mix of cinnamon, nutmeg, and ginger)
- 2 cups graham cracker crumbs
- 1 cup white chocolate chips (optional, for dipping)
- Pinch of salt
Feel free to experiment with substitutions to fit your diet or taste preferences. For a vegan option, you can use dairy-free cream cheese and maple syrup instead of powdered sugar. Want to lower the carbs? Consider using almond flour in place of graham cracker crumbs.
Timing
Before we dive into the steps, let’s talk timing. This delightful treat only takes about:
- Prep time: 20 minutes
- Chilling time: 1 hour
- Total time: 1 hour 20 minutes
What’s great about these pumpkin cheesecake balls is that they are quick to put together, making them an ideal last-minute treat when unexpected guests arrive!
How to Make Easy No Bake Pumpkin Cheesecake Balls
Step 1: Start by taking your softened cream cheese and placing it in a mixing bowl. You want the cream cheese to be at room temperature, so it blends easily with the other ingredients. Add in the pumpkin puree, powdered sugar, vanilla extract, pumpkin pie spice, and a pinch of salt. Now, get a spatula or mixer and blend everything until it’s nice and smooth. You should have a rich, creamy mixture that’s perfectly spiced.
Step 2: Gradually add in the graham cracker crumbs to the mixture. Stir until everything is combined well. You want the mixture to be thick enough to form into balls. If it feels too wet, sprinkle in a bit more graham cracker crumbs.
Step 3: Once your mixture is ready, cover your hands with a little cooking spray or water to prevent sticking. Scoop out about a tablespoon of the mixture and roll it into a ball, about 1 inch in diameter. Repeat this step until all your mixture has been shaped into balls. Don’t worry about perfection; the rustic look adds to their charm!
Step 4: Place the rolled balls on a baking sheet lined with parchment paper. Once you’ve shaped all the balls, pop the sheet into the fridge for about an hour. This chilling time helps them firm up, making them easier to handle when you serve them.
Step 5: Optional but recommended—while the balls chill, you can melt your white chocolate chips. You can do this in a microwave-safe bowl, microwaving in 30-second intervals and stirring until smooth. Once your cheesecake balls are chilled, dip them halfway into the melted chocolate, allowing the excess to drip off. Return them to the parchment-lined sheet to set.
Step 6: After the chocolate has hardened, your delicious pumpkin cheesecake balls are ready to be devoured! You can also sprinkle a little extra pumpkin pie spice or crushed graham crackers on top for that decorative touch.
Healthier Alternatives
If you’re looking to make this treat a bit healthier, you can make a few simple swaps. Instead of powdered sugar, try using coconut sugar or a sugar substitute like erythritol. Almond flour can replace graham cracker crumbs for a low-carb version, and using a cashew-based cream cheese can make this dish vegan-friendly. The beauty of this recipe is its flexibility—don’t be afraid to experiment!
Serving Suggestions
These little bites of joy are perfect for any occasion! You can serve them on a festive platter alongside fresh apple slices or drizzled with chocolate sauce for an indulgent touch. Pair them with a cup of warm spiced apple cider or a light herbal tea to complement the flavors. For a cozy presentation, you might arrange them in a mason jar with a sprinkle of chopped nuts on top.
Common Mistakes to Avoid
When making these no-bake balls, a few common pitfalls could get in the way of your pumpkin cheesecake perfection:
- Using pumpkin pie filling instead of pure pumpkin puree: Ensure you’re using pure pumpkin for the best flavor and texture.
- Not chilling the mixture enough: Chilling is key for easier rolling. If you find the mixture too soft, pop it back into the fridge for a bit longer.
- Over-melting the chocolate: When melting chocolate, be patient. Stir and heat slowly to prevent burning, as burnt chocolate can affect the flavor.
- Skipping the salt: A pinch of salt balances the sweetness and enhances the overall flavor, so don’t skip it!
Storage Tips
If you have leftovers (which is rare, but it can happen!), store your pumpkin cheesecake balls in an airtight container in the refrigerator. They will stay fresh for about a week. You can also freeze them for future indulgence; just make sure to set them on a plate to freeze individually before transferring to a freezer-safe bag or container. They can last up to 3 months in the freezer. When ready to enjoy, you can thaw them in the fridge overnight.
FAQs
How can I make these pumpkin cheesecake balls gluten-free?
You can easily make these by substituting graham cracker crumbs with almond flour or gluten-free graham cracker alternatives.
Can I make these ahead of time?
Absolutely! They can be made a day or two ahead of your event and stored in the refrigerator. Just ensure they are in an airtight container.
What’s the best way to serve these cheesecake balls?
These cheesecake balls are delightful on their own or as part of a dessert platter. Pair them with seasonal fruit or a light drink for a refreshing contrast.
How long do these pumpkin cheesecake balls last?
They can be kept in the refrigerator for up to a week and frozen for up to three months.
Can I substitute the cream cheese?
Yes! For a dairy-free version, look for a cashew or tofu-based cream cheese.
Print
No-Bake Pumpkin Cheesecake Balls
- Total Time: 80 minutes
- Yield: 24 servings 1x
Description
A quick and easy no-bake dessert combining rich pumpkin and cream cheese flavors, perfect for fall gatherings.
Ingredients
- 1 cup cream cheese, softened
- 1 cup pumpkin puree
- 1 cup powdered sugar
- 1 teaspoon vanilla extract
- 1 teaspoon pumpkin pie spice
- 2 cups graham cracker crumbs
- 1 cup white chocolate chips (optional)
- Pinch of salt
Instructions
- Start by taking your softened cream cheese and placing it in a mixing bowl.
- Add in the pumpkin puree, powdered sugar, vanilla extract, pumpkin pie spice, and a pinch of salt.
- Blend everything until it’s nice and smooth.
- Gradually add in the graham cracker crumbs to the mixture.
- Stir until everything is combined well.
- Scoop out about a tablespoon of the mixture and roll it into a ball, about 1 inch in diameter.
- Repeat this step until all your mixture has been shaped into balls.
- Place the rolled balls on a baking sheet lined with parchment paper.
- Pop the sheet into the fridge for about an hour.
- Melt your white chocolate chips in a microwave-safe bowl.
- Dip the chilled cheesecake balls halfway into the melted chocolate.
- Return them to the parchment-lined sheet to set.
- Enjoy your delicious pumpkin cheesecake balls!
Notes
For a vegan option, substitute dairy-free cream cheese and maple syrup for powdered sugar. You can also make them gluten-free by using almond flour instead of graham cracker crumbs.
- Prep Time: 20 minutes
- Cook Time: 0 minutes
- Category: Dessert
- Method: No-Bake
- Cuisine: American
Nutrition
- Serving Size: 1 ball
- Calories: 150
- Sugar: 10g
- Sodium: 90mg
- Fat: 7g
- Saturated Fat: 4g
- Unsaturated Fat: 2g
- Trans Fat: 0g
- Carbohydrates: 19g
- Fiber: 1g
- Protein: 2g
- Cholesterol: 20mg
Conclusion
In summary, this easy no-bake pumpkin cheesecake balls recipe makes an incredibly delicious treat that combines all the best flavors of fall without the fuss of baking. Not only are they simple to make, but they’re also customizable, ensuring everyone can enjoy them. So why not give it a shot? Your taste buds will thank you, and your friends and family will be eager for more!