Do you ever find yourself craving a comforting dessert that’s both delicious and surprisingly easy to whip up? If you answered yes, then let me introduce you to a delightful treat that has been a family favorite for generations: an easy homemade apple crisp. With its gooey apple filling and a crisp, buttery topping, it’s a dish that embraces the essence of fall, and it’s perfect any time you need a cozy dessert. So, roll up your sleeves and let’s dive into this simple recipe that’ll have everyone asking for seconds!
Print
Easy Homemade Apple Crisp
- Total Time: 60 minutes
- Yield: 8 servings 1x
Description
A comforting dessert featuring gooey apple filling and a crisp, buttery topping, perfect for any occasion.
Ingredients
- 6–8 medium apples (preferably Granny Smith or Honeycrisp, peeled and sliced)
- 1/2 cup granulated sugar
- 1 tablespoon lemon juice
- 1 teaspoon ground cinnamon
- 1/4 teaspoon ground nutmeg (optional)
- 1 cup old-fashioned rolled oats
- 1 cup all-purpose flour
- 1/2 cup packed brown sugar
- 1/2 cup granulated sugar
- 1/2 teaspoon salt
- 1/2 cup unsalted butter, melted (or coconut oil for a dairy-free option)
Instructions
- Preheat your oven to 350°F (175°C).
- Toss the sliced apples with sugar, lemon juice, cinnamon, and nutmeg in a large mixing bowl.
- Mix the rolled oats, flour, brown sugar, granulated sugar, and salt in another bowl. Pour in the melted butter and stir until crumbly.
- Layer the sugared apple mixture at the bottom of an 8×8-inch baking dish and spread the oat topping evenly across the apples.
- Bake for 35-40 minutes until bubbly and browned. Broil for a minute if you want extra crispiness.
- Cool for 10-15 minutes before serving, ideally with vanilla ice cream or whipped cream.
Notes
Feel free to substitute apples, adjust sweetness, or add berries for a twist. Store leftovers in the refrigerator for up to 3-5 days or freeze for up to 3 months.
- Prep Time: 20 minutes
- Cook Time: 40 minutes
- Category: Dessert
- Method: Baking
- Cuisine: American
Nutrition
- Serving Size: 1 serving
- Calories: 300
- Sugar: 20g
- Sodium: 200mg
- Fat: 14g
- Saturated Fat: 8g
- Unsaturated Fat: 4g
- Trans Fat: 0g
- Carbohydrates: 41g
- Fiber: 5g
- Protein: 3g
- Cholesterol: 30mg
Ingredients
To create the most delightful easy homemade apple crisp, you’ll need the following ingredients:
For the filling:
- 6-8 medium apples (preferably Granny Smith or Honeycrisp, peeled and sliced)
- 1/2 cup granulated sugar
- 1 tablespoon lemon juice
- 1 teaspoon ground cinnamon
- 1/4 teaspoon ground nutmeg (optional)
For the crisp topping:
- 1 cup old-fashioned rolled oats
- 1 cup all-purpose flour
- 1/2 cup packed brown sugar
- 1/2 cup granulated sugar
- 1/2 teaspoon salt
- 1/2 cup unsalted butter, melted (or coconut oil for a dairy-free option)
Optional toppings:
- Vanilla ice cream
- Whipped cream
- Chopped nuts (like pecans or walnuts)
What’s great about this recipe is its adaptability. You can mix and match different types of apples, adjust the sweetness, or even throw in some berries for a fruity twist. The description of this dessert alone is enough to get anyone excited about making it.
Timing
When it comes to making your easy homemade apple crisp, timing is everything. Here’s a quick breakdown:
- Prep Time: 15-20 minutes
- Cooking Time: 35-40 minutes
- Total Time: Approximately 55-60 minutes
This means from grabbing your apples to pulling that golden, bubbling crisp out of the oven, you’ll be just about an hour away from pure bliss. Plus, it’s a perfect dessert for those who want something comforting but don’t have a whole afternoon to spend in the kitchen.
How to Make Easy Homemade Apple Crisp
Let’s get down to the nitty-gritty. Creating your apple crisp is pretty straightforward, and I’ll guide you through it step by step.
Step 1: Start by preheating your oven to 350°F (175°C). This ensures your crisp bakes evenly and that the topping gets that perfect golden brown finish.
Step 2: While the oven heats up, grab a large mixing bowl. Toss your sliced apples in there, covering them with sugar, lemon juice, cinnamon, and nutmeg if you choose to use it. Make sure the apples are well-coated as this blend will provide delicious flavor.
Step 3: Next, prepare your crisp topping. In another bowl, mix the rolled oats, flour, brown sugar, granulated sugar, and salt. Pour in the melted butter and stir until everything is evenly moistened. The mix should be crumbly, which is just what you want.
Step 4: Now grab an 8×8-inch baking dish and layer the sugared apple mixture at the bottom. Spread the oat topping evenly across the apples, ensuring that it covers the entire surface.
Step 5: Place the dish in the preheated oven and bake for 35-40 minutes. You’re looking for a bubbling filling and a nicely browned top. If you prefer your topping extra crispy, you can broil it for a minute or two at the end, but keep a close eye on it!
Step 6: Once it’s out of the oven, let the apple crisp cool for about 10-15 minutes before serving. It’s best served warm, topped with a scoop of vanilla ice cream or a dollop of whipped cream.
Healthier Alternatives
If you’re looking to lighten things up a bit or cater to different dietary needs, there are plenty of alternatives you can use. Here are a few suggestions:
- For a gluten-free version: Use gluten-free oats and almond flour in place of regular flour.
- For a vegan option: Replace the butter with coconut oil or plant-based margarine, and use maple syrup instead of granulated sugar.
- To cut down on sugar: Experiment by using less sugar or opting for a natural sweetener like honey or agave nectar.
With these small modifications, you can enjoy a delicious dessert without sacrificing your dietary preferences or restrictions.
Serving Suggestions
When it comes time to serve your easy homemade apple crisp, presentation is key! Here are some ideas to elevate your dish:
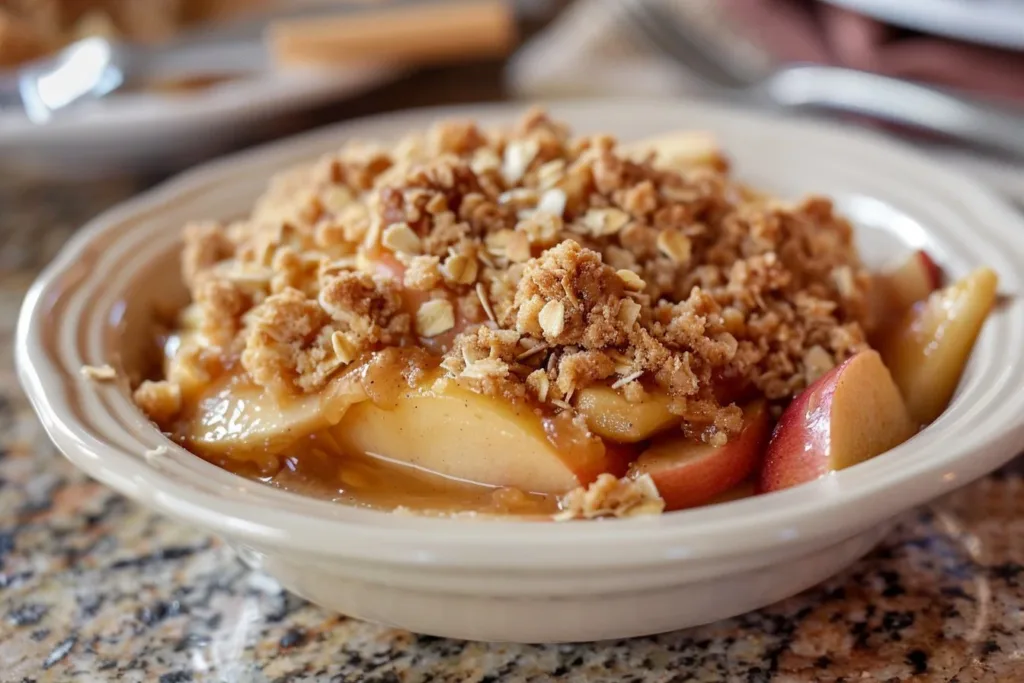
- Serve in stylish stoneware or individual ramekins for a touch of elegance.
- Drizzle with caramel sauce or honey for some added sweetness.
- Pair with a scoop of vanilla ice cream that melts into the warm apples, creating a creamy contrast that’s hard to resist.
- Top with a sprinkle of cinnamon or a handful of chopped nuts for some added crunch and flavor dimension.
No matter how you present it, your guests are sure to be impressed.
Common Mistakes to Avoid
To make sure your apple crisp turns out perfectly every time, here are a few common pitfalls to avoid:
- Using too many sweet apples: While apples like Golden Delicious are delicious on their own, they can make your dish overly sweet. Stick with tart varieties for a balanced flavor.
- Overmixing the topping: If you overmix the topping ingredients, you risk creating a dense, flat mixture instead of a delightful crispy texture.
- Not letting it cool: It might be tempting to dig right in, but allowing your apple crisp to cool for a bit helps set the filling, making it easier to serve.
By steering clear of these mistakes, you’re more likely to impress everyone at the table.
Storage Tips
If by some miracle you have leftovers, here’s how to store them correctly:
- In the refrigerator: Cover your apple crisp with foil or transfer it to an airtight container. It should stay fresh for about 3-5 days.
- In the freezer: If you’ve made a big batch, you can freeze your apple crisp for up to 3 months. Be sure to wrap it tightly in plastic wrap before storing it in an airtight container.
- To reheat: You can microwave individual portions for about 30 seconds or place it back in a preheated oven at 350°F (175°C) for 10-15 minutes until warmed through.
Meal prepping this dish can save you time and ensure you have a delicious treat on hand whenever a sweet craving strikes!
FAQs
What type of apples are best for apple crisp?
Tart apples like Granny Smith or sweet-tart varieties like Honeycrisp are best. They hold their shape well during baking and balance the sweetness of the sugar.
Can I make apple crisp ahead of time?
Absolutely! You can prepare the filling and topping separately and store them in the refrigerator for up to a day. Then, assemble and bake them just before serving.
How do I know when my apple crisp is done?
Look for a bubbly filling and a golden-brown topping. If the topping is getting too brown, you can cover it lightly with foil for the last few minutes of baking.
Can I use frozen apples for this recipe?
Yes! Just make sure to thaw and drain any excess moisture from the frozen apples before using to avoid a soggy crisp.
Is it okay to use less sugar in the filling?
Yes, you can adjust the sugar to your taste. Some apples are sweeter than others, so feel free to reduce the sugar based on your preferred level of sweetness.
Conclusion
This easy homemade apple crisp recipe is not just simple; it’s also incredibly satisfying. With little time and effort, you can create a dessert that combines sweet, tender apples and a hearty, crispy topping that will have everyone smiling. The best part? You can customize it to fit your dietary needs or flavor preferences. So why not grab those apples and start baking? You won’t regret it.